Gallery

High Elf Sea Lord

sealord_v2_1sealord_v2_2sealord_v2_3sealord_v2_4sealord_v2_5

This post has been updated with new pictures 24/05/17 after I made alterations to the base.

At long last I have completed the base for my high elf sea lord! I’m very pleased to have this project finished.

This miniature dates from the dark age of GW communication 😉 but I’m reliably informed that the sculpt is by Martin Footit. Admittedly I am biased but this is a great mini. Just the right amount of details while leaving some opportunities for free hand. I imagine that he is shouting because he has just spotted some dark elf raiders off the coast of Ulthuan.

I went with non metallic metal on this mini, mostly because I thought it would be more fun than true metallic on the helmet and the trident blade. I kept the colour scheme quite simple with only minor alterations to the ‘Eavy Metal version. I’ve painted some texture on the inside of his cape and picked out some individual hair strands and threads on the end of his sash.

sealord8_detail

I usually favour quite a minimalist base but I really wanted to have this guy overlooking the sea, so I had a go at modelling it. Overall I think I did ok, but I’m sure it’s not the finest example of this kind of scene.

I sculpted the waves with green stuff and then applied layers of water effect after painting it (Vallejo still water). After many experiments I found that a very small amount of white paint added to Vallejo transparent water gel made a fairly convincing foam, so I carefully applied that mix on the wave crest and around the rocks. The seagull is actually included on the skycutter sprue, which is a really nice touch so I had to use that too! Unfortunately it has made the piece horrendously fragile…

I’m still looking forward to seeing what GW do with the high elves in Age of Sigmar. Elves of all flavours have been conspicuously absent so far (apart from a couple of shady characters in the silver tower), but the game is nearly two years old now. Surely it can’t be too much longer?! C’mon guys, don’t make me sculpt my own again!

Gallery

Blood Angels Librarian Part 3

Another week goes by and some more progress on the librarian.

IMG_1658

IMG_1659

I’ve finished up the glazing on the blue armour and moved on to the red. I used the citadel reds here – it brought back happy memories of the hundreds of hours I spent on my blood angels diorama a couple of years ago! The base coat is mephiston red, then I highlighted with a mix of evil sunz scarlet and white, then again with more white. To shade I just added abaddon black to mephiston red. Then lots of glazes with mephiston and evil sunz.

I plan to go back to tidy up the armour a little more towards the end of the process and apply some final spot highlights. I think the lighting/camera has done something funny to the red armour in these quick pictures too – the transition between red and shade is definitely more gradual in reality than it appears here! Gah.

I’ve elected to go with true metallics on this piece rather than non metallic metal. I think it’s fair to say that the combination of this kind of shiny armour and true metallics is a bit of a marmite style. Personally I like this approach as the shinyness gives the miniature some extra impact in the hand but I have to admit that it doesn’t photograph as well as non metallic would.

For the gold I’ve used retributor armour, with a mix of dark flesh and black in the recesses, then highlighted with liberator gold and mithril silver. The steel is vallejo gun metal, shaded with black and highlighted with stormhost silver and mithril silver. Both metals get final spot highlights with vallejo metallic medium.

Plenty of parchment on this guy. After all, he’s a librarian so it makes perfect sense that he’d strap parts of his library to himself before heading into battle. 😉 For this I base coated with creamy ivory (reaper) over an initial layer of creamy ivory and khemri brown to help with coverage. Then I shaded with rhinox hide and a little black before highlighting with some white added to the ivory. After I painted on the text squiggles (a mix of rhinox and black) I used a wash of gryphonne sepia to yellow it up and increase the difference in colour with the robe a bit more.

Not too much more to do now, although I’m sure the final stages will take twice as long as I expect as usual! I should be able to get onto the axe this week. 🙂

Gallery

Blood Angels Librarian Part 2

After the very early WIP here, I’ve made a decent amount of progress with the blood angels librarian this week.

BA_lib1BA_lib2

As you can see, he’s now fully assembled. I reduced the shadows under the cheek bones a bit before gluing the chest piece in, as I felt I’d gone a bit too far with those.

I have to say that I’m finding this miniature a joy to paint. The sculpt is by Ed Cottrell and it’s a lovely open stance with some fantastic details. I’ve made some minor modifications by removing the sculpted on detail from the loin cloth and cleaning up a couple of areas on the legs where the limitations of injection moulding had required some filled in detail.

At the moment I’m working on the armour. So far I’ve base coated using kantor blue through my airbrush (I like to use the airbrush for base coating as it saves a little time). Then I built up the highlights using 1:1 enchanted blue (old citadel) and ghost white (reaper), then with more ghost white added following the technique described here. I shaded with abaddon black.

On the lower half of the miniature I’ve been applying glazes of enchanted blue and kantor blue, but I haven’t started this above the waist yet, so you can see the difference this makes. Still some way to go before the armour is done. I’m thinking I’ll add a little bit of battle damage too…

BA_loinclothFor the loincloth I wanted to experiment with combining some texturing with freehand as it’s not something I’ve done before.

I base coated with a mix of deck tan (vallejo) and rakarth flesh (citadel). Then I shaded quite roughly with 1:1 rakarth and cloudy grey (reaper), then 1:1 rakarth and abaddon black. The next step was to paint the freehand design, for which I used mephiston red (citadel). I then went over the whole loincloth using a brush with a very good point and just building up lots of dots using my previous mixes and going up to pure white dots on the creases. For the red areas I added black for the shade and the highlight dots were a mix of evil sunz scarlet (citadel), bestigor flesh (citadel) and deck tan. Looking at the pictures I may push the shading a little further, but I’m fairly happy with how this experiment has turned out.

Gallery

More work in progress

sealord_wip1sealord_wip2sealord_wip3

I’ve finished painting the sea lord now and I’m very pleased with how this has turned out. I’ve spent a lot of time on this over the last month but it has been worthwhile. It’s a lovely miniature with lots of great little details. I wish I knew who sculpted it, so if you know then please tell me!

The outside of the cape is still a little glossy and I’m unsure about committing myself to using a spray can on it (testors dullcote) since the thought of something going wrong with so many hours invested in the mini is very scary. I’ve applied a couple of coats of lahmian medium and that has definitely helped, so I think I’ll probably just leave it as is.

I’ve spent quite some time putting extra little touches into the model that are hard to see from the pictures: wood grain on the inside of the shield, very fine hair strands, a texture on the inside of the cape, and some more texture on the ends of his sash. You can maybe make out some of these on the picture below:

sealord_texture

I’m now into the phase of experimenting with various water effects for the base, so he won’t be completely finished for a while yet. I’ve therefore started my next painting project, and it’s back to 40k! Very early days for this Blood Angels librarian at the moment. I’m painting the head before I complete the assembly:

ba_lib_wip1

True metallic on this piece. But I’ll be doing my trademark shiny armour as well… 😉

Gallery

Work in progress: High Elf Sea Lord

sealord1sealord2

It has been a little while since I posted anything, so having a few spare minutes I thought I’d snap my current work in progress for the blog.

A fair amount still to do here. None of the NMM is finished yet for example, although some parts are further along than others. I’ve only just attached the trident arm, so that’s not had as much work as the rest of the mini.

I think this miniature will benefit from being photographed against a slightly darker background when it’s done – these pictures are definitely not the best!

Sadly parts of the mini seem to have picked up quite a glossy sheen so I’ll need to do something about that at some point. I do have a can of testor’s lying around somewhere but I’ve never used it before so I suspect there will be a heart in mouth moment coming up! I’ll be ‘test’ing it on something I haven’t put quite so many hours into first though. 😉

I’ve also recently acquired some water effects so I’ll be having a play with that on the base.

Let’s see if I actually manage to finish this one without something going wrong! My success rate has been poor of late…

Gallery

Scale and Perfectionism

tauriel_varanguard

I haven’t posted for a few weeks simply because I haven’t made as much progress with current projects as I’d hoped. The Varanguard has reached a fully assembled state… and stalled. Partly this is because I fell into my old trap and didn’t plan as thoroughly as I should have done. Consequently I’m underwhelmed with the effect of the lighting coming from the lava (in my head it just looked so much cooler!) and one or two other things. But I’ve realised that really the problem is more to do with scale.

The Varanguard is big. It’s difficult to get a true sense of it from pictures but I placed it next to a pre Age of Sigmar cavalry model (a High Elf Dragon Prince) and the difference is startling. The overall surface area that needs painting is vast in comparison, and of course this means that it takes far longer to complete the project. For this miniature there are also a great deal of details which add to the time needed.

There was a time in the not so distant past when I would have been prepared to plough 100 hours into a single model, but these days I find my willingness to commit to projects of this nature greatly reduced. I think this has a lot to do with the fact that I’m no longer chasing competition glory but just painting for the fun of it. Beyond a certain point I tend to get bored with a miniature and want to move on to the next thing. With the motivation of competition I was able to push through this and on to completion but if I’m painting for fun and it’s starting to become not fun then what is the point?

One possible solution to this conundrum would be to back off on the quality a bit to reduce the painting time. But I know that when I do this I’m inevitably unsatisfied with what I’ve produced. So this is a non-starter (although the Varanguard will probably end up getting this treatment just so I can get it off my desk). The only other possibility I can see is to work at a smaller scale so that I can indulge my perfectionism while keeping the total project time down to a manageable level.

I had a lot fun last year painting my own 15 mm sculpts, and this is something I’d like to do more of in the future. On those minis I could really go to town, painting everything in non metallic metal and even getting in some bits of freehand while still keeping the total time per mini to 10-20 hours. However, I have to concede that such diminutive miniatures just don’t have the impact of larger figures. I’d also like to be able to paint something without having to sculpt it and get it printed first!

Over the last couple of weeks I’ve been painting up a Tauriel from the Hobbit line, and I’ve come to the conclusion that this sits right in my sweet spot for scale. It’s a lovely sculpt, and the face in particular is better than I had thought from the box art (although I still need to tidy it up a little). The project is nearing completion and I’m not sick of looking at it yet despite pushing myself to the limit of my ability.

So I think that’s the answer for me – in the future I’ll be focussing again on single miniatures on foot when it comes to painting. It’s just a bit of a shame that there are so few LotR/Hobbit characters available in plastic because I really don’t like dealing with all the imperfections that come with resin and metal! I think I’ll be ok going up in scale to the smaller Warhammer miniatures, but I need to test that. This will open up a much larger range of possibilities but I worry a little about the trend towards huge character models that GW has been exhibiting recently. Don’t get me wrong: they’re fantastic miniatures, absolutely brilliant sculpts. They just don’t fit into my hobby at the moment.

Gallery

Varanguard work in progress 2

I had some time off work this week (yay!) so I was able to make some more progress on the Varanguard.

img_1600img_1599img_1601

Everything still very much WIP at this stage. (It’s starting to feel like this project will never end!) Since last week I’ve at least got paint on every part of the mount, painted the base and made a start on the rider. I’ve worked on the OSL a little, but I’m still not particularly happy with it yet.

For the bronze metals I’ve used a base of balthasar gold, painted the recesses with black and highlighted with fulgurite copper and then speed metal from Scale 75. It’s the first time I’ve used fulgurite copper and like the other new (slightly more expensive) metallics in the citadel line it’s very very nice to use. I’m not sure what they’ve done differently with these paints but they have a distinctive smell when you open the pot – reminiscent of alcohol based paints. I’ll probably still push the highlights a bit further. I still need to work on the steel areas anyway.

I spent quite a lot of time painting the various horns and teeth using the same colours I used on the hooves. There are another six horns that I haven’t glued on to the mount yet because I know if I do then I’ll just keep catching them while I work on other bits!

The legs on the rider haven’t been shaded or glazed yet, so you can see the difference that these steps make when comparing to the armour on the mount. Mind you, the mount’s armour isn’t completely finished either! I tend to leave final highlights until the end because of my tendency to accidently rub them off or catch them with another colour. I’ll probably add some battle damage too.

That’s probably my last post for this year, since I don’t expect to have much hobby time until the new year. I hope everyone reading this has a great Christmas (if you celebrate it) and a fantastic 2017.


Gallery

Varanguard work in progress

A few weeks ago I shared a very early WIP of the Varanguard from Warhammer Age of Sigmar I’ve started painting. Here’s how it looked then:

varanguard1

I’ve been able to make a bit more progress recently, although I’ve had slightly less time for hobby stuff than usual. I’m deliberately taking my time over this and the model is quite large with loads of detail so it’s very slow going! It feels good to be back trying to paint at my highest level though, as it has been quite a while.

varanguard_181216_1varanguard_181216_2

Here’s how it looks as of this morning. I don’t consider any element finished yet, although some parts are obviously more advanced than others. Once I’ve given all the areas a basic highlight and shade (which isn’t too far off now) I’ll be going back to refine things.

For the object source lighting on the armour I’ve applied 1:1 trollslayer orange and white, then 1:1 trollslayer and flash gitz yellow with lots of white using the technique I described here. I’ve glazed with pure evil sunz scarlet, trollslayer and flash gitz and also applied some of these glazes to some of the flesh. I’ll paint the lava base fairly soon and then I’ll be able to glue the miniature in place and refine the OSL, as it’s still quite rough at the moment.

I’ve decided to use some true metallics on this piece as I like the extra impact they can give. For the bits I’ve painted so far I’ve used a base coat of VMA gun grey, shaded with black into the recesses and highlighted with stormhost silver. I’ll be pushing the highlights further later and may glaze some colour into the shadows later.

For the hooves I basecoated with VMC chocolate brown and black, shaded with black and highlighted with golden shadow and yellowed bone from reaper. I’m keeping to quite orangey browns so it fits with my colour scheme.

Hopefully more progress to come this week!

Gallery

What’s on the painting desk

I haven’t had a huge amount of exciting hobby activity to report recently, but I’m quietly working away on various projects. Here’s a brief update on the state of play painting-wise at the moment. Definitely a Chaotic theme going on at the moment!

I’m still grinding my way through the Storm of Sigmar miniatures, trying to keep myself to a few hours per mini and live with the inevitable imperfections. I’ve now turned my attention to the Chaos side of the box and I’ve got the 5 bloodreavers finished.

bloodreavers1bloodreavers2

Obviously keeping things very simple here. I’ve gone for a cold green armour and shaded the flesh with some purple added to the mix as a complementary colour. I would have liked to get some more warm spot colours in there but there’s not a huge amount of scope for it on these very simple miniatures and I wanted to keep things simple and fast, so I limited myself to the hair on the heads that the leader is carrying. He obviously has a hatred of red heads!

I may go back and add some gore to the weapons once I’ve got the blood warriors painted.

I’ve been itching to get back into some higher end painting again recently, so I’ve also started work on a Varanguard that I received from painting legend and all round top bloke Max Faleij. This will take quite a lot longer than the Storm of Sigmar miniatures!

Not a huge amount of progress so far. I’ve partially assembled it, got a vague idea of where the base is going and made a start on the painting.

varanguard1

I airbrushed a basecoat of Vallejo squid pink desaturated with light grey and white from underneath and a 1:1 mix of incubi darkness and kabalite green from above then cracked out the paintbrushes.

The flesh was shaded with a mix of vmc magenta heavily desaturated with cloudy grey and then a violet, black red and black mix for the deepest recesses. Then I highlighted with white and a tiny amount of squid pink mixed in. I’m thinking I’ll go back later and maybe add some veins or other markings for interest, plus glaze some more colour around the mouth and tail.

For the armour I’ve been highlighting with a 1:1 mix of baharroth blue and sybarite green, then with white added. I shaded with a mix of incubi darkness and black and glazed with kabalite green but it still needs more work. I plan on putting in some reflections from the lava that will be on the base too.

I’ve just started painting the black trim. I intend to use true metallic on this piece but I wanted to avoid making all the trim metallic as I prefer to use these paints sparingly.

That’s it for now!

Gallery

Step by step: Warriors of Darkness Savage

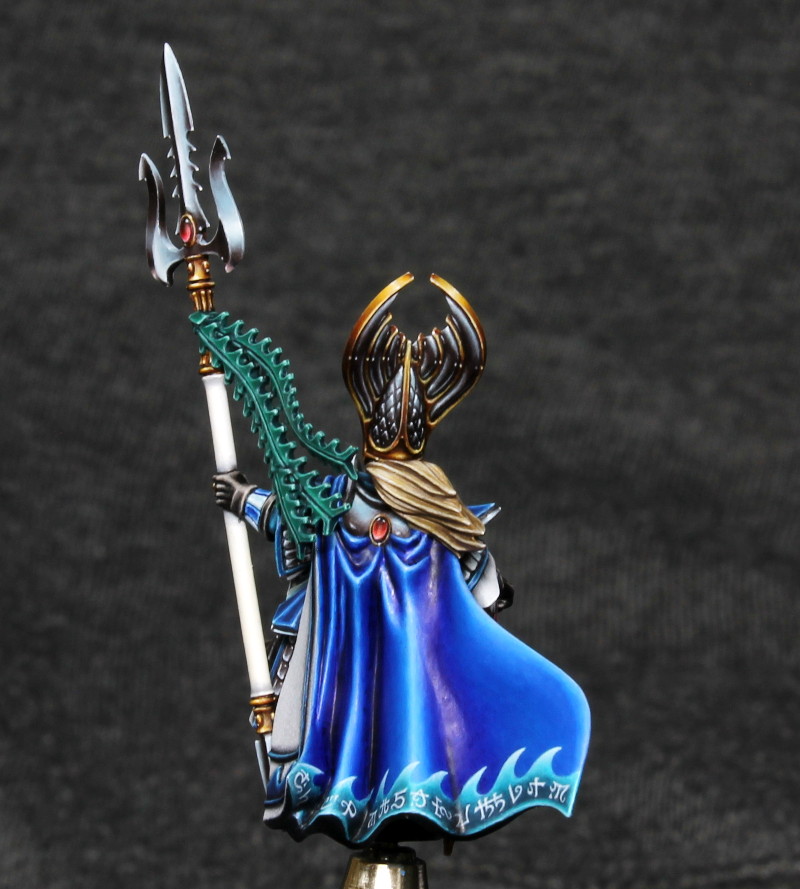
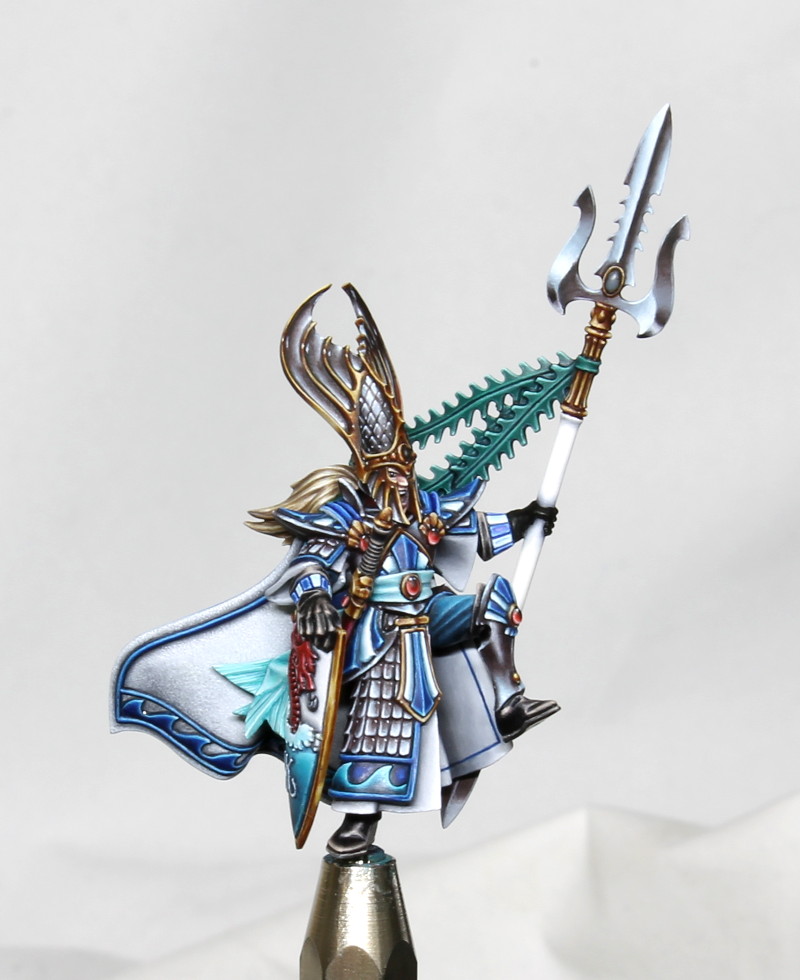
Firstly, some good news – my heroes and skeletons have been included in the Shapeways gift guide, so any order including them qualifies for free shipping in the US and EU using the code SHIP4FREE until November 20th!

And now to business:

I actually remembered to take some photos while I was painting my Warriors of Darkness, so I thought I’d post a step by step guide. I’m using one of the savages here since it contains areas of both flesh and armour.

I’ll just explain briefly what I did in each step rather than going into detailed discussion, but the approach is very similar to my recent Dark Sword painting tutorial. I’ve tried to keep the lighting level consistent but because I painted the miniatures over a few days there is a little variation, so apologies for that. My paints are a mixture of different vintages – sadly some of them are no longer available but it should be possible to find equivalents with a little googling!

I find it great fun painting these 15 mm miniatures. The smaller size means I can turn them out in just a few hours each without compromising on quality. I exaggerated all the details during sculpting, so they’re actually less fiddly than a lot of 28 mm minis I’ve come across.

hordesman1

I started by removing the remaining supports and gently sanding away any print artifacts with 800 grit sandpaper. The miniature was washed in warm soapy water and glued to a penny with a mixture of sand and small pieces of slate applied over a thin layer of milliput.

(There’s another post here where I discuss the initial preparation of these miniatures in a little more detail.)

hordesman2

I painted the base using gorthor brown and cloudy grey with washes of agrax earthshade and nuln oil. I then drybrushed with graveyard earth, karak stone and longbeard grey.

The flesh was basecoated with 2:1 fair highlight and rakarth flesh. I didn’t use any primer – the plastic takes the paint well.

hordesman3

I shaded the flesh with a 1:1:1 mix of rakarth flesh, cloudy grey and rhinox hide with a little reikland fleshshade added. A deeper shade of 1:1:1 cloudy grey, rhinox hide and black was then applied to the deepest recesses.

hordesman5

The shading was neatened up a bit where necessary with a re-application of the base coat. I then added a layer of 1:1 creamy ivory and white.

hordesman6

The armour was base coated with khorne red.

hordesman6b

A highlight of 1:1 squig orange and white was applied to the armour.

hordesman7

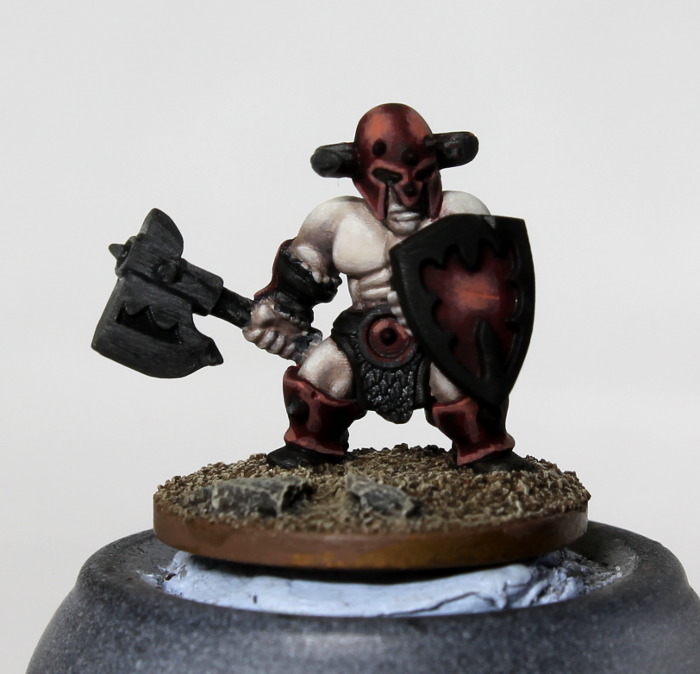
The armour was shaded with a khorne red and black mix, then pure black in the deepest recesses.

hordesman8

A second highlight of white with a little of the previous highlight mix added.

hordesman9

The armour was then glazed with evil sunz scarlet and khorne red.

hordesman10

The axe handle was painted with khemri brown, shaded with a mix of desert yellow and black and highlighted with yellowed bone.

The edge of the shield was painted with abaddon black and highlighted with cloudy grey. The axe was base coated with cloudy grey.

hordesman11

The axe was highlighted with a 1:1 mix of rainy grey and white, with a touch of temple guard blue added.

hordesman12

The axe was shaded with a mix of cloudy grey and black, with a little mephiston red added. Pure black was used in for the deepest shadows.

hordesman13

The axe was highlighted again with white and a little of the previous highlight mix added.

hordesman14

The highlight paints were used to create scoring on the axe blade (using a gentle touch and a brush with a very good point). Small pure white highlight spots were added and the ground reflections were glazed with rainy grey with a small amount of dark flesh added.

hordesman15

A second highlight of 1:1 rainy grey and white was applied to the shield edge and a black glaze was used to neaten it up. The boots and the loin cloth were painted the same way.

The fur was painted with rhinox hide, then highlighted over a progressively smaller area with bestial brown, vomit brown and yellowed bone.

The leather straps were painted with rhinox hide, highlighted with 1:1 ratskin flesh and tanned skin and shaded with black.

hordesman16

The brass was base coated with 1:1 dark flesh and vermin brown, highlighted with 1:1 orange brown and creamy ivory, then with more creamy ivory. Shades were rhinox hide and black. The base coat was used for glazing.

The horns were painted with creamy ivory then balor brown, rhinox hide and black working towards the ends so each colour covered a smaller area than the last.

The armour was finished with small white highlights and some extra chips painted onto the helmet.

The eyes were painted and the lower lip glazed with a little khorne red added to the flesh tone highlight.

Finally the edge of the penny was painted black and a tuft from MiniNatur added. Done!