Gallery

Blood Angels Librarian Part 3

Another week goes by and some more progress on the librarian.

IMG_1658

IMG_1659

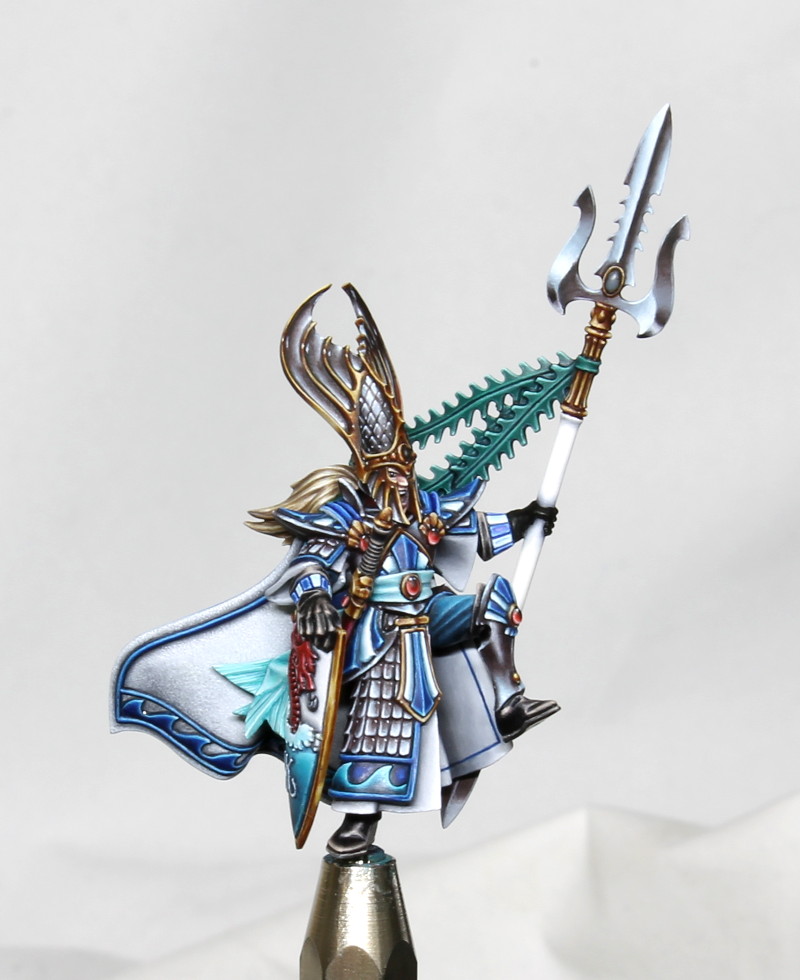
I’ve finished up the glazing on the blue armour and moved on to the red. I used the citadel reds here – it brought back happy memories of the hundreds of hours I spent on my blood angels diorama a couple of years ago! The base coat is mephiston red, then I highlighted with a mix of evil sunz scarlet and white, then again with more white. To shade I just added abaddon black to mephiston red. Then lots of glazes with mephiston and evil sunz.

I plan to go back to tidy up the armour a little more towards the end of the process and apply some final spot highlights. I think the lighting/camera has done something funny to the red armour in these quick pictures too – the transition between red and shade is definitely more gradual in reality than it appears here! Gah.

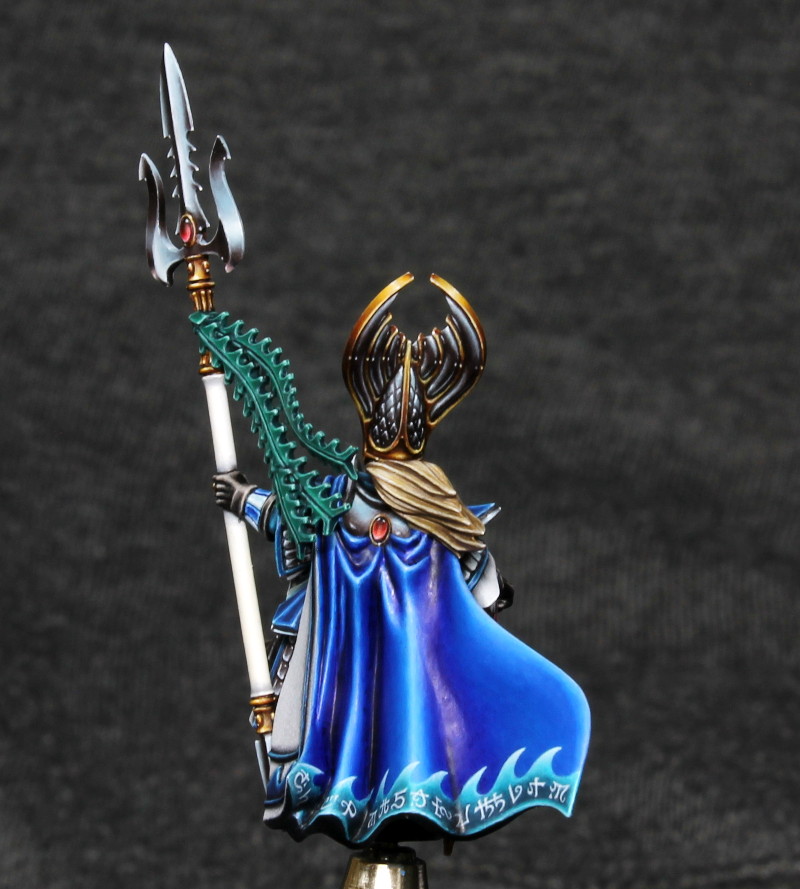
I’ve elected to go with true metallics on this piece rather than non metallic metal. I think it’s fair to say that the combination of this kind of shiny armour and true metallics is a bit of a marmite style. Personally I like this approach as the shinyness gives the miniature some extra impact in the hand but I have to admit that it doesn’t photograph as well as non metallic would.

For the gold I’ve used retributor armour, with a mix of dark flesh and black in the recesses, then highlighted with liberator gold and mithril silver. The steel is vallejo gun metal, shaded with black and highlighted with stormhost silver and mithril silver. Both metals get final spot highlights with vallejo metallic medium.

Plenty of parchment on this guy. After all, he’s a librarian so it makes perfect sense that he’d strap parts of his library to himself before heading into battle. 😉 For this I base coated with creamy ivory (reaper) over an initial layer of creamy ivory and khemri brown to help with coverage. Then I shaded with rhinox hide and a little black before highlighting with some white added to the ivory. After I painted on the text squiggles (a mix of rhinox and black) I used a wash of gryphonne sepia to yellow it up and increase the difference in colour with the robe a bit more.

Not too much more to do now, although I’m sure the final stages will take twice as long as I expect as usual! I should be able to get onto the axe this week. 🙂

Gallery

Blood Angels Librarian Part 2

After the very early WIP here, I’ve made a decent amount of progress with the blood angels librarian this week.

BA_lib1BA_lib2

As you can see, he’s now fully assembled. I reduced the shadows under the cheek bones a bit before gluing the chest piece in, as I felt I’d gone a bit too far with those.

I have to say that I’m finding this miniature a joy to paint. The sculpt is by Ed Cottrell and it’s a lovely open stance with some fantastic details. I’ve made some minor modifications by removing the sculpted on detail from the loin cloth and cleaning up a couple of areas on the legs where the limitations of injection moulding had required some filled in detail.

At the moment I’m working on the armour. So far I’ve base coated using kantor blue through my airbrush (I like to use the airbrush for base coating as it saves a little time). Then I built up the highlights using 1:1 enchanted blue (old citadel) and ghost white (reaper), then with more ghost white added following the technique described here. I shaded with abaddon black.

On the lower half of the miniature I’ve been applying glazes of enchanted blue and kantor blue, but I haven’t started this above the waist yet, so you can see the difference this makes. Still some way to go before the armour is done. I’m thinking I’ll add a little bit of battle damage too…

BA_loinclothFor the loincloth I wanted to experiment with combining some texturing with freehand as it’s not something I’ve done before.

I base coated with a mix of deck tan (vallejo) and rakarth flesh (citadel). Then I shaded quite roughly with 1:1 rakarth and cloudy grey (reaper), then 1:1 rakarth and abaddon black. The next step was to paint the freehand design, for which I used mephiston red (citadel). I then went over the whole loincloth using a brush with a very good point and just building up lots of dots using my previous mixes and going up to pure white dots on the creases. For the red areas I added black for the shade and the highlight dots were a mix of evil sunz scarlet (citadel), bestigor flesh (citadel) and deck tan. Looking at the pictures I may push the shading a little further, but I’m fairly happy with how this experiment has turned out.

Gallery

More work in progress

sealord_wip1sealord_wip2sealord_wip3

I’ve finished painting the sea lord now and I’m very pleased with how this has turned out. I’ve spent a lot of time on this over the last month but it has been worthwhile. It’s a lovely miniature with lots of great little details. I wish I knew who sculpted it, so if you know then please tell me!

The outside of the cape is still a little glossy and I’m unsure about committing myself to using a spray can on it (testors dullcote) since the thought of something going wrong with so many hours invested in the mini is very scary. I’ve applied a couple of coats of lahmian medium and that has definitely helped, so I think I’ll probably just leave it as is.

I’ve spent quite some time putting extra little touches into the model that are hard to see from the pictures: wood grain on the inside of the shield, very fine hair strands, a texture on the inside of the cape, and some more texture on the ends of his sash. You can maybe make out some of these on the picture below:

sealord_texture

I’m now into the phase of experimenting with various water effects for the base, so he won’t be completely finished for a while yet. I’ve therefore started my next painting project, and it’s back to 40k! Very early days for this Blood Angels librarian at the moment. I’m painting the head before I complete the assembly:

ba_lib_wip1

True metallic on this piece. But I’ll be doing my trademark shiny armour as well… 😉

Gallery

Work in progress: High Elf Sea Lord

sealord1sealord2

It has been a little while since I posted anything, so having a few spare minutes I thought I’d snap my current work in progress for the blog.

A fair amount still to do here. None of the NMM is finished yet for example, although some parts are further along than others. I’ve only just attached the trident arm, so that’s not had as much work as the rest of the mini.

I think this miniature will benefit from being photographed against a slightly darker background when it’s done – these pictures are definitely not the best!

Sadly parts of the mini seem to have picked up quite a glossy sheen so I’ll need to do something about that at some point. I do have a can of testor’s lying around somewhere but I’ve never used it before so I suspect there will be a heart in mouth moment coming up! I’ll be ‘test’ing it on something I haven’t put quite so many hours into first though. 😉

I’ve also recently acquired some water effects so I’ll be having a play with that on the base.

Let’s see if I actually manage to finish this one without something going wrong! My success rate has been poor of late…