How to win a golden demon

Good news! If you live in the UK it has never been easier to win a golden demon. Currently there are no fewer than four golden demon painting competitions throughout the year, so no shortage of opportunities!

(If you don’t live in the UK, you have my commiserations. But it seems like things may be improving since a European competition was announced last week at very short notice.)

But even with so many possibilities, it’s not necessarily that easy to take home one of the fabled resin monstrosities. After several years of success I’ve pretty much retired from competition painting, but I thought it would be worth sharing my thoughts about the process. Entering competitions and meeting other painters is good fun (even if you’re an extreme introvert like me), but it can be even more fun if you win something.

This post will be focussed on golden demon, but I think that many of the same principles apply to other competitions. Obviously this is only my opinion as I’ve never been on a judging panel, and I don’t imagine I’m saying anything that hasn’t been said before, but there you go.

Master the fundamentals

This is pretty obvious but has to be mentioned. You need to be able to paint neatly with high contrast and smooth transitions, and have at least a rudimentary grasp of colour theory.

Unfortunately there aren’t really any shortcuts here – you will have to spend a lot of time practicing. Happily there is far more information about than there used to be so a lack of knowledge shouldn’t ever be a roadblock.

(Really useful advice there: “to win a painting award you need to get good at painting”. Genius. Hopefully the rest of this post will be a little more valuable!)

Choose your category

If you’ve never won a demon and you just want your best chance of winning one then you should consider that some categories are generally less competitive than others. Squad is generally less competitive than single miniature for example.

However, category picking is a risky game as there’s no way of knowing what other people will bring. It only takes three top notch entries to appear in your chosen category and your chances of winning just got a lot worse.

If you’ve got time, it’s not a bad idea to bring more than one entry and cover a few categories. But only if you genuinely have the time. One entry that is painted to the absolute limit of your ability is better than two that are a bit rushed.

Personally I’m not a fan of category picking. Instead you should…

Paint what inspires you

Here’s the thing: if you’re going to win, you’re probably going to have to spend many hours painting your entry when you’re pretty much sick of the sight of it.

You know how it goes, at the start of a project you’ve got loads of enthusiasm and can’t wait to get stuck in. Then about halfway through the process you’ve put plenty of time in and the thing looks cack – loads of rough blends you need to go back neaten up, bits that you caught with the brush while painting something else… Urgh.

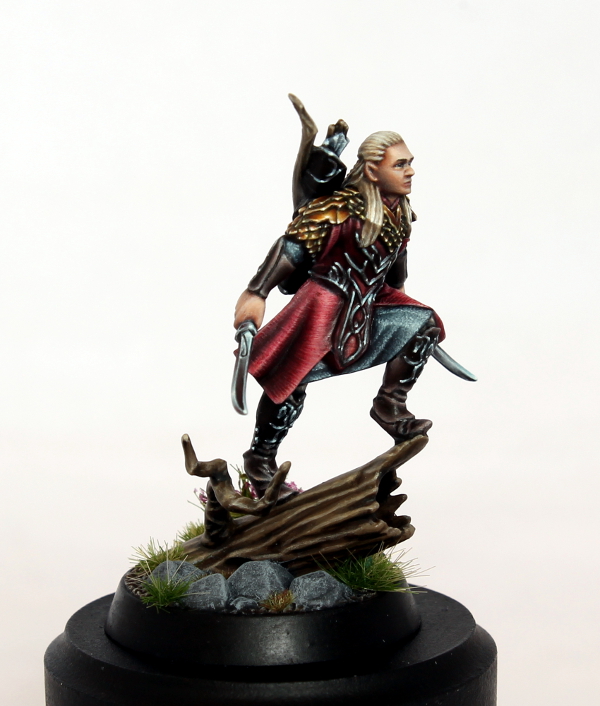
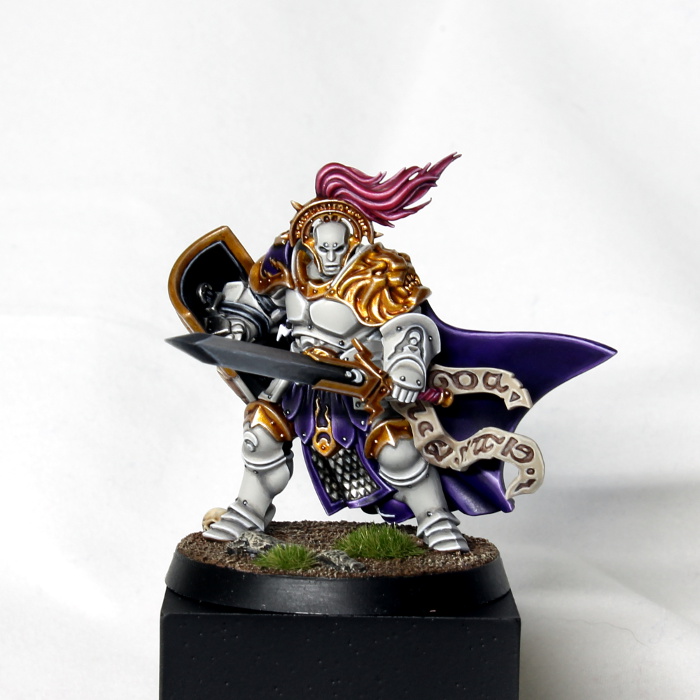
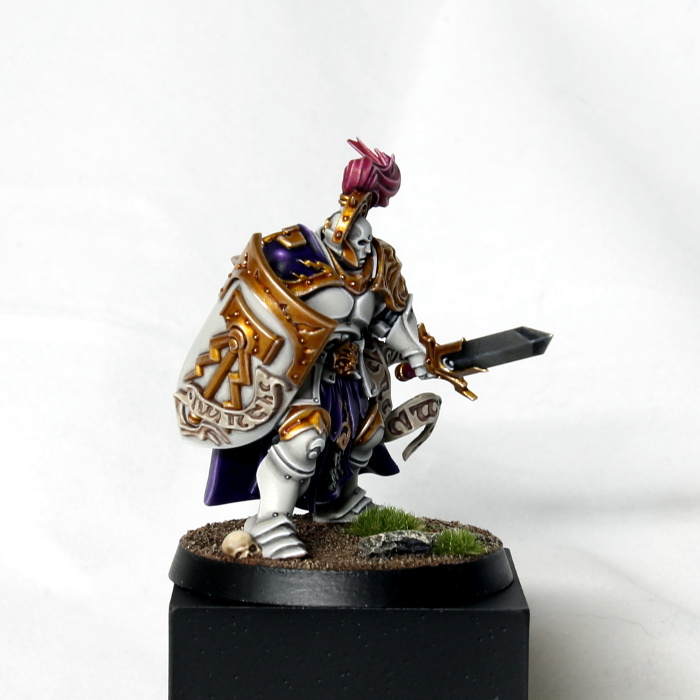
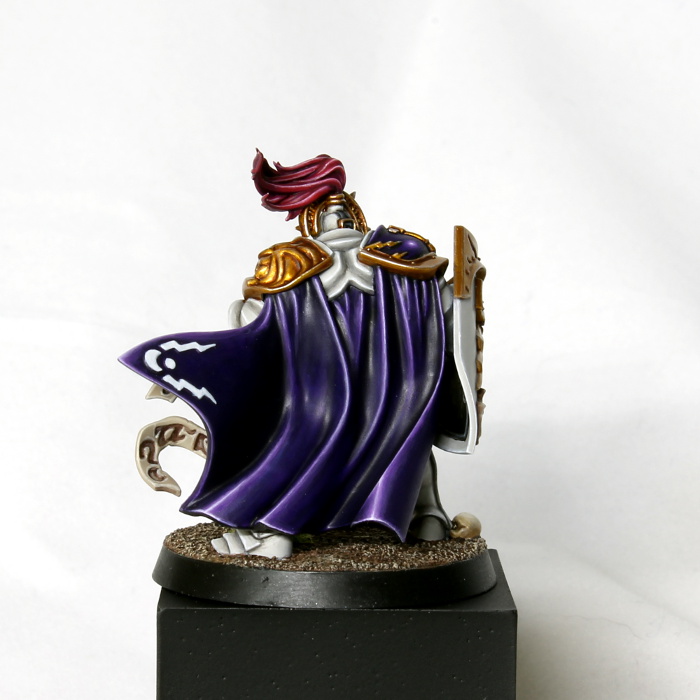
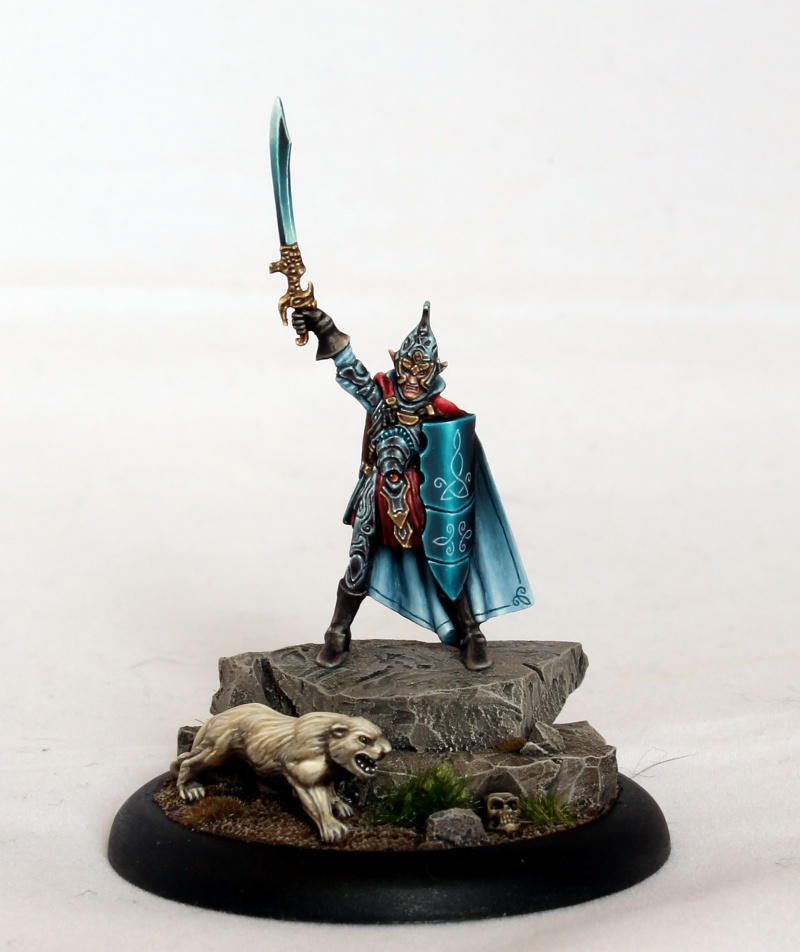
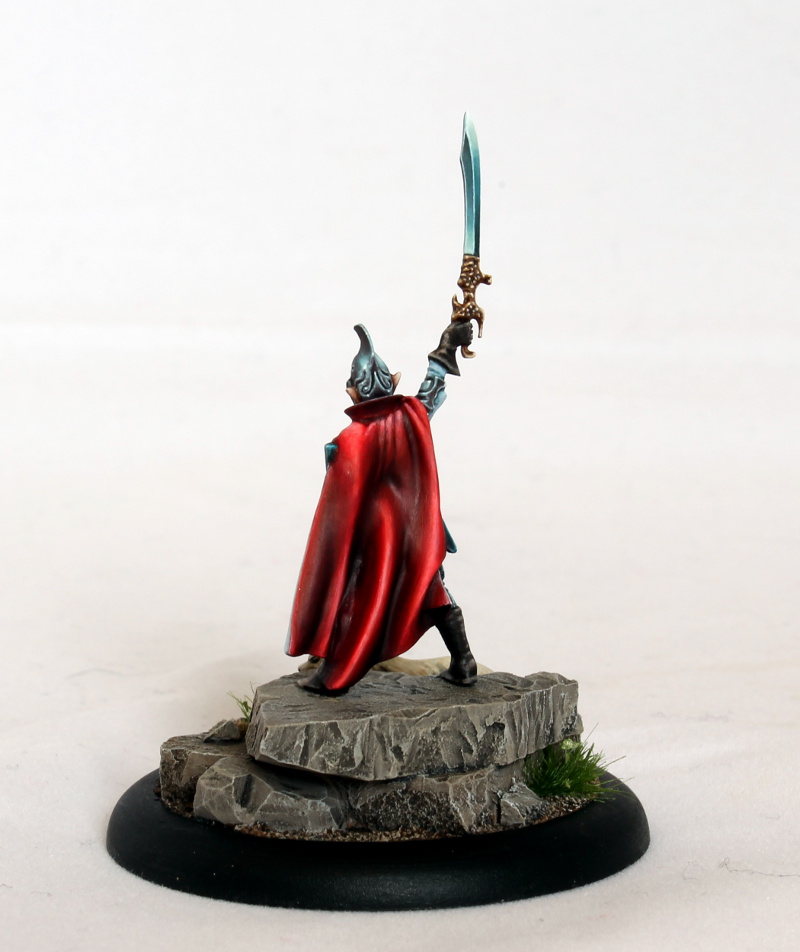
It’s very easy to put a miniature down at this point and work on the next shiny thing instead, or just rush to completion so it’s out of the way. You’ll have a much better chance of avoiding either of these pitfalls if you were really, really keen on your subject at the outset. That’s why almost all my entries are elves and red space marines. 😉

Plan it properly

Don’t start painting until you’ve really thought through your composition (more important in some categories than others) and colour scheme. You should also have a good idea about any other elements like object source lighting or freehands you’re going to bring in before you start.

It’s a little bit cheeky me saying this, as I have been very guilty of being impatient to get stuck into painting and letting the planning side suffer. But planning is definitely a good idea: do as I say, not as I do. 😉

Make sure you respect the IP

You need to remember that Games Workshop want to use images of golden demon entries in their marketing material. So it’s not a good idea to prepare some hugely elaborate entry that doesn’t really fit into the background. I’ve seen some flat out stunning entries win nothing because of this reason.

Now this doesn’t mean that you can’t be creative. It’s just that you need to make sure that your creativity occurs within the bounds of the intellectual property. If this is too much of a limitation for you then I would recommend going to a different painting competition – there are plenty.

Bases don’t matter

Ok, a bit of an exaggeration, but it’s definitely true that a simple base is no barrier to winning. The miniature is what matters most.

Obviously don’t do something that is going to detract from the miniature, and it’s great if you can make a little scene that will reinforce the background. Just don’t get so sucked in to this that you neglect the painting on the miniature.

Oh, and you definitely don’t need to get one of those fancy name plates for your plinth. I never have. A plinth is a good idea though, as it makes life easier for the judges and photographers to handle your miniatures without worrying about breaking something. Model Display Products are great for simple resin plinths.

BA_dio4
Boring base. Result: slayer sword


Play to your strengths

Are you really good at freehands but not very experienced at object source lighting? Do you have a great technique for painting faces?

A competition piece probably isn’t the best place to try and learn a new technique. Or if you really want to do something new then practice it on another miniature before you commit yourself.

Make it perfect

I can’t emphasise this enough. Ok, so it’s not possible to attain true perfection, but that shouldn’t stop you trying. This is a competition and you can’t afford to be handing something in with an obvious problem. It’s tempting to think ‘ah, they’ll never notice that little mould line’, or ‘yeah, that blend is probably good enough’.

Trust me, if you’re seriously in contention for a win then these things will get noticed.

What you want to be doing is trying to make it impossible for a judge to find something obviously wrong with the miniature. A fantastic composition and a beautiful colour scheme will not compensate for a technical error. Don’t give them a reason to put your piece out of contention.

(Incidentally I suspect that this issue is at the heart of a lot of post competition whinging. You see a lot of entries that look amazing and yet somehow come away empty handed. The chances are that they made an error that you can’t see just by looking at photos, but becomes apparent when the miniature is inspected at 3 inches under good lighting. Only the judges are in the privileged position of being able to do this, and I’m often amazed that the armchair enthusiast is so vehement that they know better. And being able to look at the pieces in the cabinet is no better – the lighting in those cabinets is awful.)

When I think I’ve finished a competition entry I like to take high resolution photos of it. In looking at the pictures I always find a few areas I think I can improve, so I go back and do it. Eventually I’ll really be struggling to find anything I think I can improve and that’s when I consider the piece competition ready.

Legolas_close
Super close up – try to spot the mistakes! Coin is not mandatory.


Make it stand out

It’s really difficult to wow the judges, as the chances are they’ve seen everything before. But if you can include a few neat tricks that the competition probably won’t have done then this may help your chances – but only if you can execute them well.

Things you might consider include non metallic metal, colour fades, freehand, texturing, object source lighting, weathering.

Ask for feedback and listen to it

If you’ve been unsuccessful it’s definitely worth asking a judge the reasons why. They’re a great bunch and usually very willing to give feedback.

Once you have the feedback, don’t just dismiss it. Use it to do better next time.

Keep a sense of perspective

It has been known for an unsuccessful contestant to boo the winner at the award ceremony, and post competition whinging on the internet is usually pretty rife.

At the end of the day, this is a competition around painting toy soldiers. Yes, it’s disappointing to put so much effort into a piece and feel that it hasn’t been recognised, but really there are bigger problems in the world. Accept it and move on!

Conclusion

Well, that’s everything I can think of. I suppose a lot of this can be boiled down to having the right mind set, and how hard you’re prepared to work.

If you’ve never entered golden demon before but you’re planning on attending one of the events where a competition will be held, give it a go! It doesn’t cost anything, and what have you got to lose? Maybe you won’t win first time round but you’ll probably learn something useful. And you may get to take home a neat little finalist pin, which is guaranteed to greatly enhance your sexual magnetism whenever you wear it. 😉

Gallery

15 mm miniatures available to buy

smalloxminiaturesA few people have asked me about buying the 15 mm miniatures I’ve been showing off recently, so I’ve opened a shop where you can purchase my designs from Shapeways.

Unfortunately it’s not possible for me to offer the miniatures for sale in the black high definition acrylate material, which is a shame as it’s better quality and would be a little cheaper. Currently Shapeways are offering this as a maker only material, but if this changes then I will open up this option.

Of the two materials available, I would recommend ‘frosted extreme detail’ over ‘frosted ultra detail’. My own experiments have shown that there is a noticeable difference in how well details are rendered.

heroesfrontSkeletons1


Gallery

Skeletons

Skeletons1Skeletons2Skeletons3Skeletons4
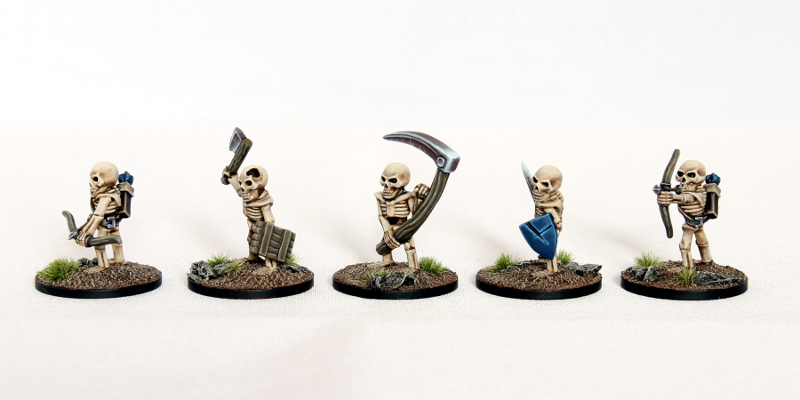
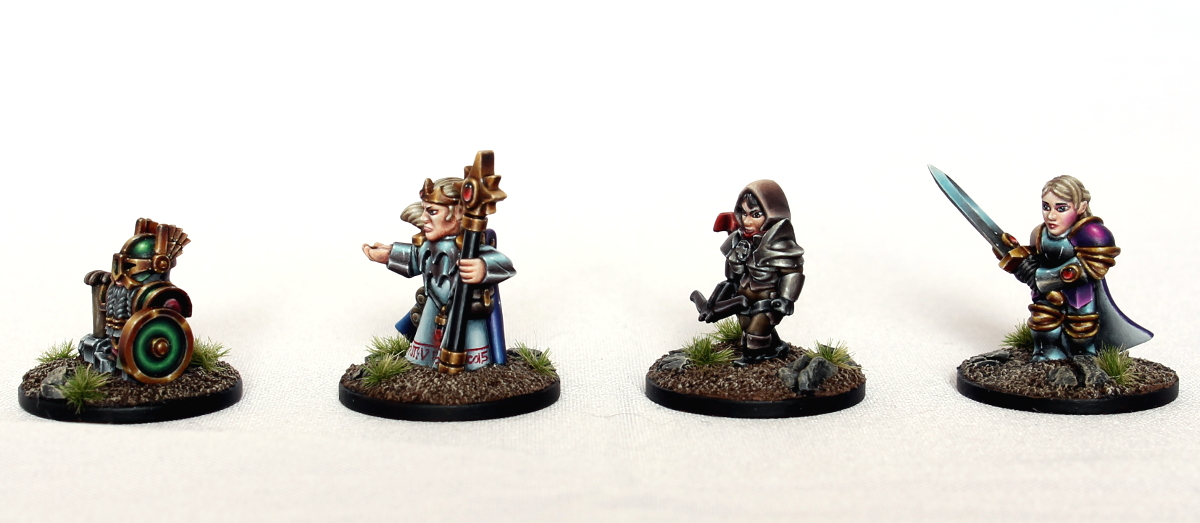
More of the 15 mm miniatures I’ve sculpted for myself – some baddies this time! There is a vague plan to play some games with these when I’ve got enough of them. I’m thinking something like Song of Blades and Heroes or maybe Open Combat (although I don’t believe this covers fantasy particularly well at the moment). But I will also need to sort out some terrain before then.

I sculpted the skeleton with the scythe first (an obvious nod to Heroquest) and after a successful test print I created the other four. It was here that one of the big advantages of digital sculpting became apparent, as it was a simple matter to just rearrange the parts I’d already made. Apart from modifying the skulls (a few missing teeth, a big hole in one of them) I just had to make some new equipment and call it done.

I abandoned any thoughts of getting miniatures cast in the interval between the ‘Heroquest’ skeleton and the others, so it freed me up to pose them however I liked. I’m really pleased with the arrows on the two skeletons with bows. The shafts are right on the design limit for thickness in Shapeways B-HDA material so I was a bit concerned about how they’d print but they came out great.

I’ve made a decision to use non metallic metal throughout all my 15 mm miniatures but I avoided the super shiny look here and tried to make the weapons look a bit more weathered. Very quick to paint these though – I got all 5 done in a single day which is unheard of for me!


Colours used:

Bone

Basecoat: yellowed bone (reaper), wash with agrax earthshade (gw)

Shade deepest recesses with rhinox hide (gw) and black

Highlight with creamy ivory (reaper) and white

Metal

Basecoat: cloudy grey (reaper)

Highlight: 1:1 rainy grey (reaper)/white with a touch of temple guard blue (gw), then add more white up to pure white

Shade: cloudy grey and dark flesh (gw), add black

Wood

Basecoat: khemri brown (gw)

Wash with desert yellow (gw) and black mix, deepest recesses with thinned black

Highlight with kommando khaki (gw) then creamy ivory (reaper)

3d printing for miniatures

3d printing – it’s the future, right? We’ll all be printing our miniatures at home in a year or so and GW will be out of business.

Well, let’s see…

I’ve been playing around with digital sculpting and 3d printing for over a year now, so I thought it would be useful to share some of my experiences. In this post I’ll focus on the various materials and printers I’ve tried. Be warned: this article will be text heavy and probably of limited interest to most miniature enthusiasts!

Shapeways frosted extreme detail

fxd.JPG
FXD: difficult to see!

Frosted extreme detail (FXD) prints are created using a multijet modelling process. Basically the object is built up by depositing layers of molten plastic. Each layer hardens and is cured by UV light before the next layer is deposited. There is a wax support material that is removed at the end of the build process by melting it in an oven. Shapeways then clean the print before shipping it out.


Good points about FXD are that it is very precise – you can model a weapon with a properly sharp point or edge if you want to. And unlike other print technologies, there is no need for manual removal of support structures, so no risk of the part being damaged.

Each layer is only 16 microns in height (0.016 mm), so the stepping in the z-axis (vertical direction) is minimal. I don’t know what the resolution in the horizontal plane is, but it definitely doesn’t seem to be as good. This means that for a miniature you want it to be printed the right way up to get the best result.

Unfortunately Shapeways will orient the miniature as they wish in order to maximise the number of parts they can fit on the build tray. Combined with surface roughness that occurs where the support wax contacts the part, this leads to a lack of consistency. I have printed the same miniature twice and had markedly different results.

It is possible to clean up FXD prints to a standard that allows for high quality painting. I have had success with 400 grit sandpaper, but of course you do have to be very careful not to obliterate details. When cleaning the material the transparency of FXD is a pain, as it makes it very easy to miss rough areas and stepping lines that only become apparent when the painting has started.

Shapeways black high definition acrylate

dragon_maiden7
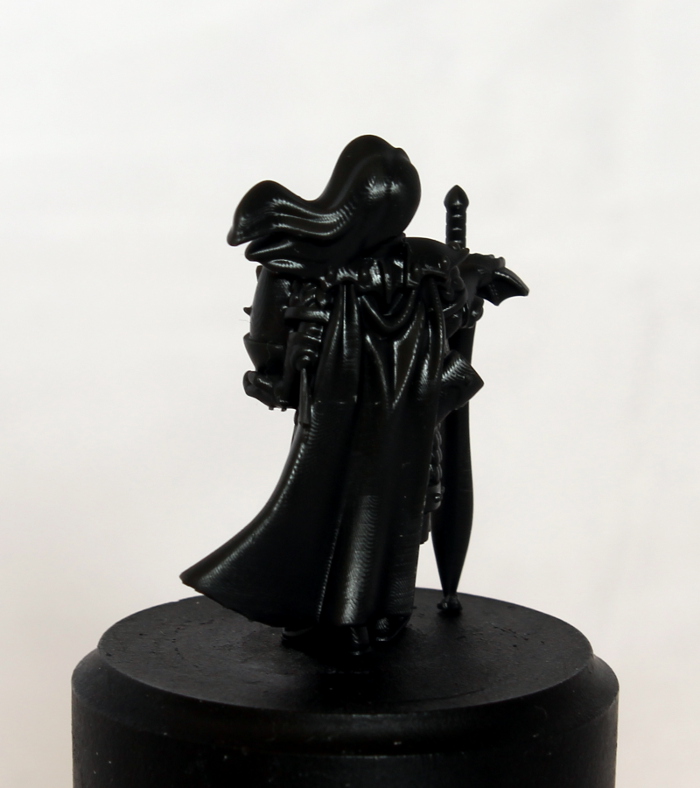
Recently Shapeways have started offering the snappily titled black high definition acrylate (B-HDA). At the time of writing this is a maker only material, so it’s not possible for anyone other than the model owner to order a print.

B-HDA is a direct light projection (DLP) technology. The part is built one layer at a time by projecting cross sections of the design onto a bath of liquid resin, causing it to cure where the light hits it. This approach requires that support structures are created as the part is built to prevent it collapsing under it’s own weight.

Overall I have found this material to be a significant improvement over FXD for miniatures. The z axis resolution is given as 50 microns rather than 16, so I had expected to find a noticeable reduction in detail. In practice this doesn’t seem to be the case and even some very fine details I have included on my models have been reproduced. However, it is apparent that sharp edges are not quite as tight as FXD (though still very good).

The material is a bit softer and more flexible than FXD (which is somewhat brittle). I believe that this is how Shapeways are able to achieve a reduction in print artefacts despite the apparent lower resolution of the process. It seems that the material ‘relaxes’ a little as the piece is created, smoothing the surface. Because the material is also opaque, it’s significantly easier to clean up for painting. I generally use 800 grit. You probably could paint straight onto it, but I’m quite fastidious about surface prep!

Reproducibility seems to be better with this material, but at this point I don’t have enough B-HDA prints to say this with total confidence.

The major downside is those support structures. Shapeways are fairly good at working out where to place them but not perfect. For some models I’ve actually resorted to building my own support structures in to the .stl file when I found I was getting repeated failures in the same spot. Shapeways don’t offer the option to remove the supports yourself, so you just have to hope that whoever does it doesn’t mangle the miniature too badly! (To be fair, they have been pretty good with this in my experience but I’d still like to do it myself – presumably this could reduce the cost of production too.)

Formlabs Form 1+ and Form 2

I have also explored the possibility of buying my own printer. This would greatly speed up the design process, since I could test a design in a matter of hours rather than weeks – it’s so frustrating to receive a new print and immediately realise that something needs to be fixed!

There are plenty of desktop printers available for a few hundred quid, but they generally seem to be of the fused deposition modelling (FDM) type. From the research I’ve done, these printers are nowhere near good enough for producing miniatures.

Currently there are a few DLP printers available to the home user, but the cost is an order of magnitude higher. The Form 2 printer seems to be the best on the market in this group, but it will set you back three grand. And the resin is more than a hundred quid a bottle. And the build platform needs to be replaced every two bottles…

I have procured test prints of my miniatures on the Form 1+and Form 2 printers from a couple of UK based companies using 3d hubs. The minimum step height of these printers is 25 micron but I would say that the results are not quite as good as B-HDA from Shapeways (but still very good). I suspect that the difference lies in the resin. I have tried the black and the grey resin – they’re both more brittle than B-HDA (particularly the grey) and it seems to result in more visible stepping.

I have played with the free to download PreForm software that prepares a .stl file for printing on a Form printer. It’s very easy to use and gives full control over the placement of support structures. Unfortunately the setting that automatically generates supports places a lot of them (even on the lowest density setting) and they tend to be quite thick. This results in a lot of wasted expensive resin and makes it more difficult to clean up the print.

If I had my own printer I reckon I could get away with fewer, thinner supports for my miniatures but it’s not something you can really experiment with when someone else is doing the printing – understandably they’re worried about the print failing and prefer to stick to what the software says is needed.

Overall I think the Form printers have potential for miniatures, but I’m not prepared to gamble so much of my own money to find out!

Envisiontec perfactory

dwarves800
Envisiontec print on the left, B-HDA on the right

Envisiontec perfactory printers seem to be the best that is currently available for high detail. Through various nefarious means I have been able to obtain samples of a few of my 15 mm miniatures printed on one of these machines and they are indeed a wondrous sight to behold. In fact the prints are so good that they evoke feelings of inadequacy in this neophyte sculptor: you dare to print your nonsense on this tool of the Gods? Foolish mortal!

As far as I know these machines are also of the DLP type, but the witchcraft that Envisiontec possess makes them clearly superior to any of the other printers I have encountered. In fairness there are still some very slight print artefacts, and there are still supports that have to be removed but otherwise the print will be an almost perfect rendition of the digital file.

As I understand it, if the RCP30 resin is used the prints can be placed directly into black rubber moulds for metal casting, but this is not something that I have explored further.

It’s difficult to find out exactly what one of these machines costs without contacting Envisiontec’s sales department, but I’m fairly confident you’re looking at 5 figures.

If you’re interested in obtaining your own Envisiontec prints I recommend Timo Laumann in Germany or RN Estudio in Spain. I also got some quotes for prints from some UK companies. Let’s just say they were uncompetitive…

Cost of prints

It’s probably worth giving some idea of the cost per print on the various options I’ve discussed above. Obviously there are several variables – the size of the miniature and the exchange rate being the obvious ones.

Currently a print of my dragon maiden would cost me £14.22 in FXD. Shapeways also offer a slightly less detailed frosted ultra detail option in the same material. That would be £10.20, but it’s not worth bothering with in my opinion.

B-HDA is £9.39 for this miniature. But it should be noted that part of this cost is the flat rate of $5 per part, so even a tiny 15 mm miniature would end up being £6+. You can reduce the impact of this by making several miniatures into a single part using sprues, but this has to be done in the right way or the model will be rejected under Shapeways ‘no sprues’ rule!

The other notable expense when using Shapeways is the cost of shipping. The cheapest option is UPS at about £8 a time (Netherlands to UK), even for a tiny lightweight package.

Quotes for prints on a Formlabs printer vary a bit, but are generally a bit cheaper than using Shapeways (plus much cheaper shipping). I’ve calculated that if I had my own printer each miniature would cost around £1 in consumables but the upfront cost is obviously steep.

There’s a wider range in the Envisiontec quotes I had, but you’re probably going to be looking at somewhere in the region of £100 for a single 30mm miniature. Only to be contemplated if you’re serious about going down the casting route!

Conclusion

I hope this rather gargantuan post will be useful to somebody – I certainly struggled to find out a lot of this information since the pool of people out there trying to print miniatures seems to be quite small. And I’d rather not think about how much I’ve spent in total on my various experiments!

The technology is moving quite quickly, so this information may soon be out of date. But unless there is a big new development in 3d printing technology I don’t see the picture changing massively in the short to medium term. I think GW and the rest of the industry are safe enough with their current business model for the time being!

Gallery

Knight-Questor

questor1Questor2Questor3Questor4

I’ve not given up on painting at least the heroes from the silver tower, although I can’t really afford to spend a lot of time on them. 😦

Painting this guy was made more difficult because he was fully assembled – I’d definitely leave the shield off if I was painting this for competition!

I tried out the new citadel gold metallic and the gloss shade – overall very impressed with these! I think the deepest recesses need to be made a little darker with paint rather than relying on the shade, but I do like the way it doesn’t dull the shine.

I was going for a fairly ‘eavy metal style on this piece. It’s funny, but the more I paint miniatures, the more I appreciate this approach since it looks good in all light conditions. And I think achieving a good result is more difficult than a lot of people think.

From now on I’m going to try and note down colours that I’ve used in these posts. Partly to aid my ailing memory and partly because I often get asked what colours I’ve used and it seems sensible to me to just write it once!

Main colours used on this piece were as follows:

Armour

Basecoat: VMC deck tan (pallid wych flesh is a close match for this).

Shade: 1:1 rakarth flesh/cloudy grey (reaper) and add some black. The deepest recesses end up being a fairly dark grey.

Highlight: white.

Purple trim

Basecoat: naggaroth night

Shade: VGA Imperial blue and black

Highlight: VMC violet, genestealer purple, add white

Gold

Basecoat: retributor armour

Shade: reikland flesh (gloss), dark flesh/black mix for deepest recesses

Highlight: liberator gold, mithril silver

Plume and sword handle

Basecoat: 2:1 warlock purple: wazdakka red

Shade: liche purple, add black

Highlight: add white to basecoat

Glaze with wazdakka

Gallery

Mantic elf (and cat)

mantic1mantic2mantic3mantic4mantic5

The colour scheme will doubtless seem somewhat familiar to anyone that has seen my recent Dragon Maiden, but I painted this many moons ago and it never saw the light of day.

I think at one time there was talk of an online painting competition alongside one of Mantic’s open days so I painted up this elf and his pet cat from the copy of Dwarf Kings Hold: Green Menace that I’ve got lying around.

If the competition ever happened I never saw it, but it seemed a shame never to share this so here it is. 🙂

Gallery

Dragon Maiden

dragon_maiden1dragon_maiden2dragon_maiden3dragon_maiden4dragon_maiden5dragon_maiden6After proving beyond doubt my total mastery of sculpting 15 mm miniatures ;), I decided it was time to have a go at a slightly larger scale. So here you have my first attempt at sculpting a 30 mm miniature.

Concept-wise there’s nothing particularly original here. Games Workshop have been starving me of High Elves recently (at the moment it’s starting to look doubtful they’ll ever return, but I live in hope) so I decided to make my own. As I usually do when I sculpt something, I spent a while with a pencil and paper sketching various designs for armour and so on. I rejected a few designs that I thought looked cool on the grounds that they probably wouldn’t print very well or look good when painted.

I was conscious that I needed to get better at anatomy. At 15 mm you can get away with a certain amount of fudging, especially with the distorted proportions I’ve been favouring. As the miniature gets bigger it becomes more difficult to hide this ineptitude, so I spent some time on google and bought a book (Anatomy for 3D Artists) to try and improve my knowledge. There is still a long way for me to go in this area though.

I wanted the scale to be similar to the Warhammer range. Happily I have hordes of these miniatures lying around, so some time with a ruler enabled me to get a rough idea of the proportions to use. The pose was deliberately kept very simple as I was already stretching myself with this project and I didn’t want to make it any more difficult than it needed to be.

blender
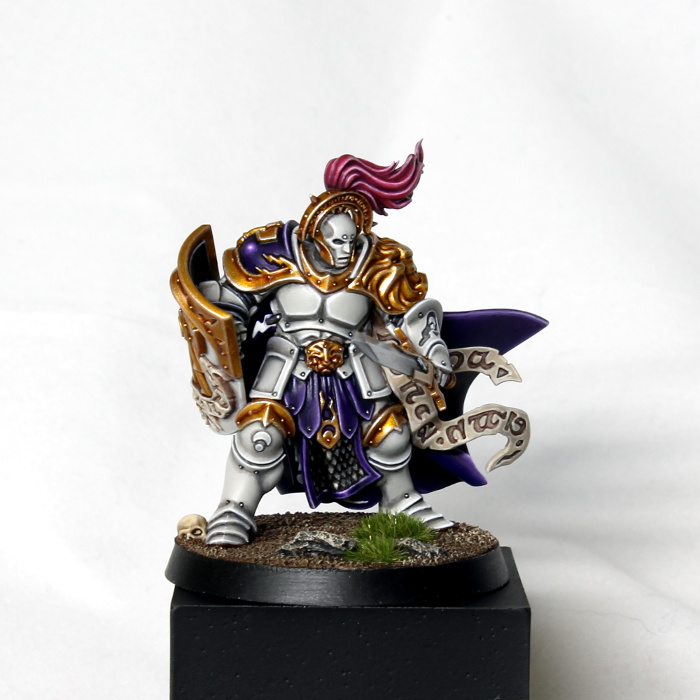
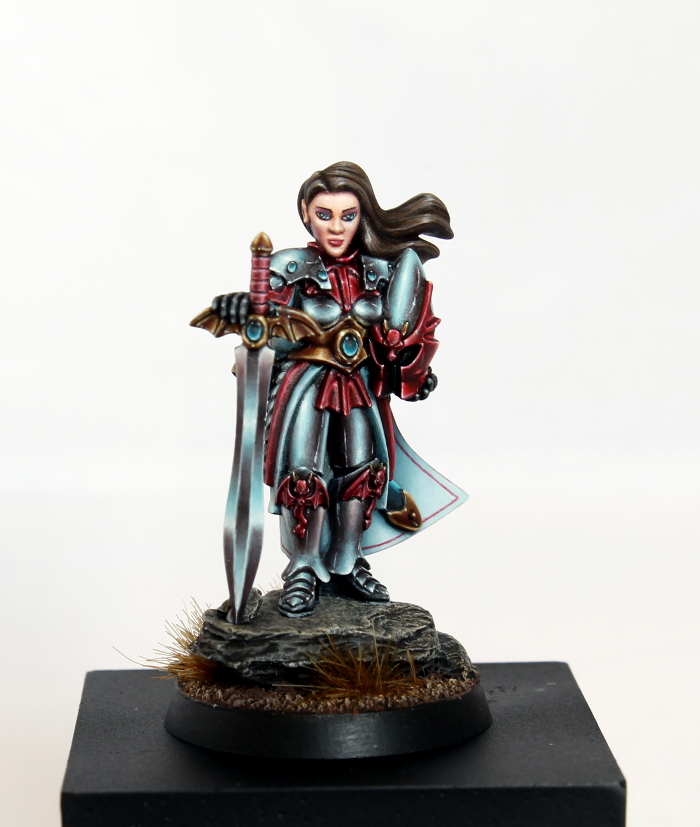
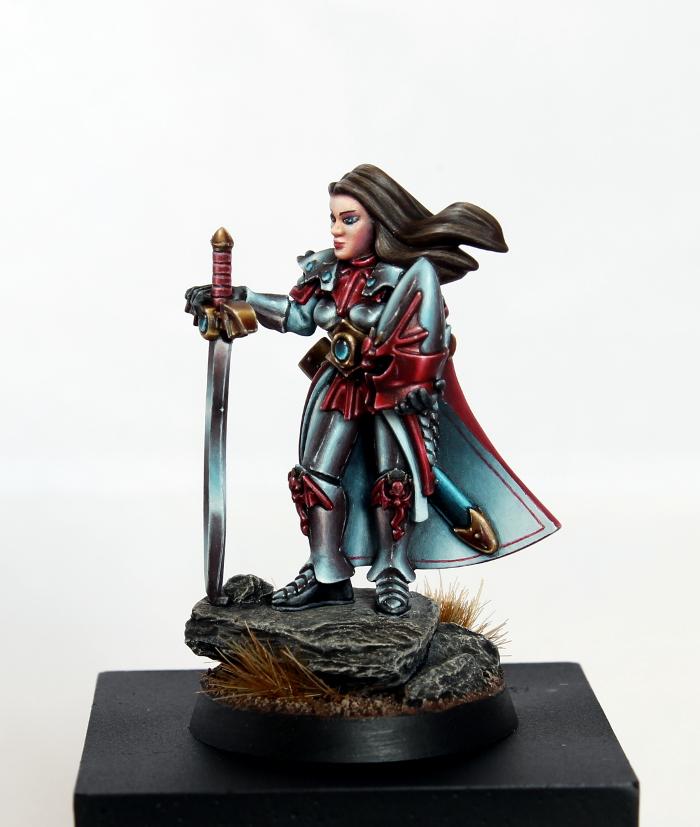
I roughed out the proportions in blender and spent a fair bit of time viewing the model from every angle until I was happy that the anatomy wasn’t too awful. I then went back and refined each element, and made decisions about how the hair and the cloak would flow. Hair is an interesting element – you can either sculpt individual strands, accepting that due to the limitations of the printer they will be thicker than you’d like, or you can just sculpt the general form of the hair and let the painter deal with it. Because of my experience painting this kind of featureless hair in various plastic kits I decided to go this way. But perversely I’ve gone the other way with my 15 mm miniatures and I’m quite happy with that too!

highelf_render

As usual, the miniature was printed at Shapeways. In this case I was able to evaluate the new high definition black acrylate material vs frosted extreme detail. My impressions are overall favourable, but I’ll probably write more about that in a future post.

dragon_maiden7dragon_maiden8

There are one or two things I’d do differently next time. Because this was my first miniature in this scale I wasn’t totally sure how much I needed to exaggerate the details to get a good result. I think I did ok overall, but there are a couple of places where I didn’t get it quite right. The biggest disappointment was the eyes, which are too bulbous. For the 15 mm miniatures I’ve found that I need to make the eye protrude quite a lot to get it to print well, but here it’s overdone. I disguised it as well as I could with the paint, but it’s a source of irritation!

I elected to go with non metallic metal when painting as there are some interesting shapes and I wanted to explore the reflections. For the steel parts I used my tried and tested method of highlighting with cyan and shading with red added to the mix.

Overall I am quite pleased with how the miniature has turned out for a first effort at this scale and I’ve learnt a lot that will hopefully lead to better results in the future.

If you want, you can buy your own copy here.


dragonmaiden_coin

Gallery

Tiny heroes

heroesfrontheroessideheroes_rear
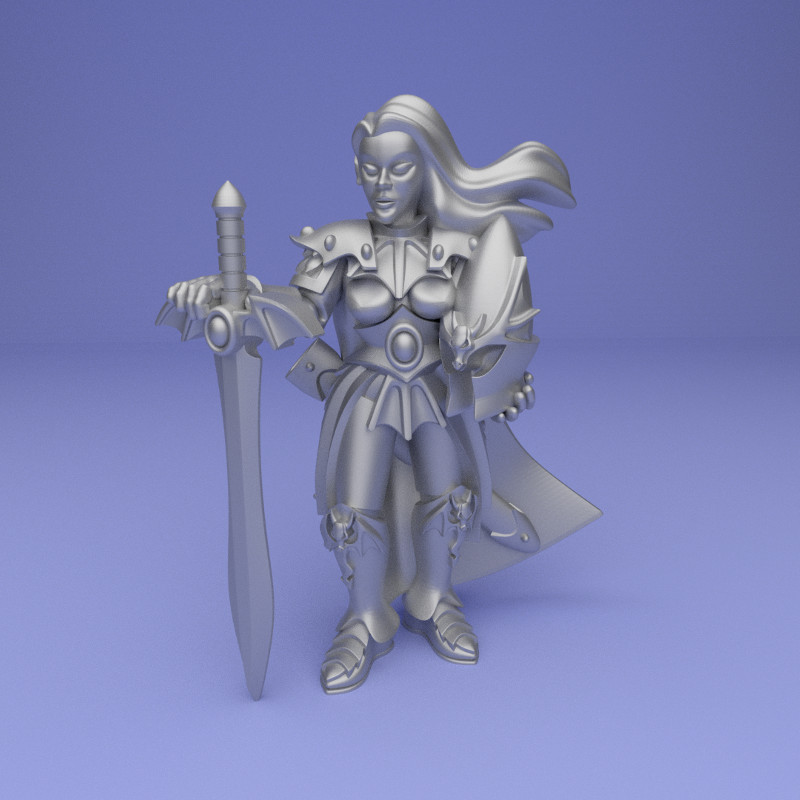
I’ve been playing with digital sculpting on and off for a little over a year now, using blender for the actual sculpting and getting 3d prints from Shapeways. I intend to write more about what I’ve learnt in future posts, but for now I’d like to show off some of my first attempts at 15 mm fantasy sculpting.

After a few initial experiments I chose 15 mm as my preferred scale for a few reasons:

  1. I like painting very small miniatures, mostly because it’s quicker and I’m impatient.
  2. It’s about the smallest scale that is compatible with the resolution of Shapeways’ current printers – any smaller and the stepping artefacts start to obscure the details.
  3. Small miniatures are less expensive to print (but still not cheap)!

The miniatures are deliberately very ‘heroic’ in their proportions. In reality an average person’s head should be around 1/8 of their height. It seems that Games Workshop like to use about 1/6 for their Warhammer ranges. At this scale I’ve gone even further and the heads are about 1/3 of the miniature’s height. To my eye this gives the miniatures more impact and it makes them more enjoyable to paint.

I will happily admit that the concepts for these minis are not particularly original – sadly I’ve never had a particularly active imagination. Here you have a dwarf warrior, an elven mage, a demon hunter and a paladin: fairly well trodden fantasy tropes.

When I sculpted these miniatures I was entertaining vague thoughts of getting them cast along with some villains, so I designed them in such a way that I think they could be moulded as single pieces. I’ve since abandoned this idea though, largely because I found it was limiting my ability to sculpt what I wanted to. So my more recent stuff is definitely not going to be suitable for production but is a bit more dynamic. Hopefully I’ll be able to show some of that soon!


Thoughts on brushes

A good brush can make a big difference to the results you can achieve. I’ve seen it said that it’s not worth getting decent brushes when you’re starting out but I’m not sure I agree. The process of learning to paint miniatures is frustrating enough without upping the difficulty by using a cheapo craft brush.

Unsurprisingly I advocate the use of kolinsky sable brushes. There doesn’t seem to be any other type of brush that holds such a fine point, and this is key to being able to paint neatly.

These days I mostly paint with just a couple of sizes of brush. I use a size 2 for the majority of my painting, only switching to a size 0 when it’s really necessary. (Typically this will be for very small details or for the sharpest edge highlights. I also use a size 0 quite a lot in glazing transitions on small areas.) I do also have some 2/0 brushes, but these are only called on in times of direst need. I never use anything smaller than this.

There are good reasons for using the largest brush you can get away with. A larger brush will obviously enable you to cover an area more quickly. It will also mean fewer brush strokes, so less opportunity to build up surface roughness. And importantly, a larger belly means that you have more time to apply paint to the miniature before it begins to dry so the paint will flow more smoothly.

It’s not true that you can’t paint neatly with a larger brush. As long as it comes to a fine point then you can achieve a lot.

There are a bewildering array of manufacturers that provide kolinsky sable brushes and over the years I’ve experimented with a wide variety. There are subtle differences in feel and some painters swear by only using certain brands. Personally I don’t find that the ‘snap’ of a brush has much impact on my painting. The most important factors to me are the consistency of the product (i.e. what are the chances I’ll get a dud brush) and cost.

In my opinion the brushes from Rosemary & Co are the winners on these criteria. I don’t think I’ve ever had a bad brush and the prices are extremely competitive. Service is also excellent: typically I will place an order and receive it in the mail the next working day (Although I’m in the UK – I would imagine it could take a bit longer for overseas).

I’ve tried series 8, 22 and 33. They’re all great, but I haven’t found a compelling reason to pay the extra pennies for series 8 or 22, so nowadays I just stick to series 33.

I should also mention that you don’t need to use a fantastic brush for everything – my brushes are required to perform different duties depending on their age. Brand new brushes are deployed only when the most precise point is needed (freehands, tiny reflection spots, painting texture etc). Slightly older brushes will suffice for general painting and glazing, while veterans are entrusted with basecoating. That’s the theory anyway – I have to admit that it doesn’t always work out like that!

Gallery

Legolas Greenleaf

Legolas1

I’m very fond of GW’s Lord of the Rings range. The films made a big impression on me and the sculpts (I think they’re mostly the work of the Perry twins) really capture the mood and the aesthetic. Result: a very inspired and motivated painter!

I’m much less keen on the Hobbit however. I read the book as a kid and didn’t particularly like it, and predictably the films weren’t a patch on the LotR trilogy. So I was less enthusiastic about the minis to begin with (even though there are still some lovely sculpts), and it wasn’t helped by them coinciding with the finecast era! Fortunately there are a few plastics available, so when I was looking for something to paint up as a result of a late decision to go to Warhammer Fest I decided to give Legolas a go.

I’ll hold my hands up here and say that I was so keen to get painting that I didn’t really think much about colours. I had a vague idea that I wanted his robe to be dark red and fancied doing the armour in gold, but beyond that nothing was planned. This is a bad habit of mine that I’m trying to correct with future projects.

Legolas2.JPG

When painting LotR/Hobbit minis for competition the challenge is to do something to make yours stand out. Compared to the Warhammer ranges the minis are very small and have a lovely simplicity about them. I’ve had good results in the past with subtle little freehands and texturing and I decided to employ both here. (In case you’re wondering, the freehand on this piece are the little patterns I painted on the daggers – I told you they were subtle.)

I spent some time with a couple of reference pictures of Orlando Bloom trying to place the highlights and shades to capture the likeness. I don’t think I was wholly successful in this – but the face really is tiny so I was probably being a bit ambitious.

I went for NMM on this piece as I find metallics don’t have much impact when the details are so small.

Legolas3

One of the things I like about this scale is that the minis are small enough that I can indulge the inner perfectionist and make every blend as smooth as possible without it resulting in hundreds of hours of work. I think Legolas ended up being as close to flawless as anything I’ve achieved so far, and I was very pleased to take gold at Golden Demon.

Legolas_close